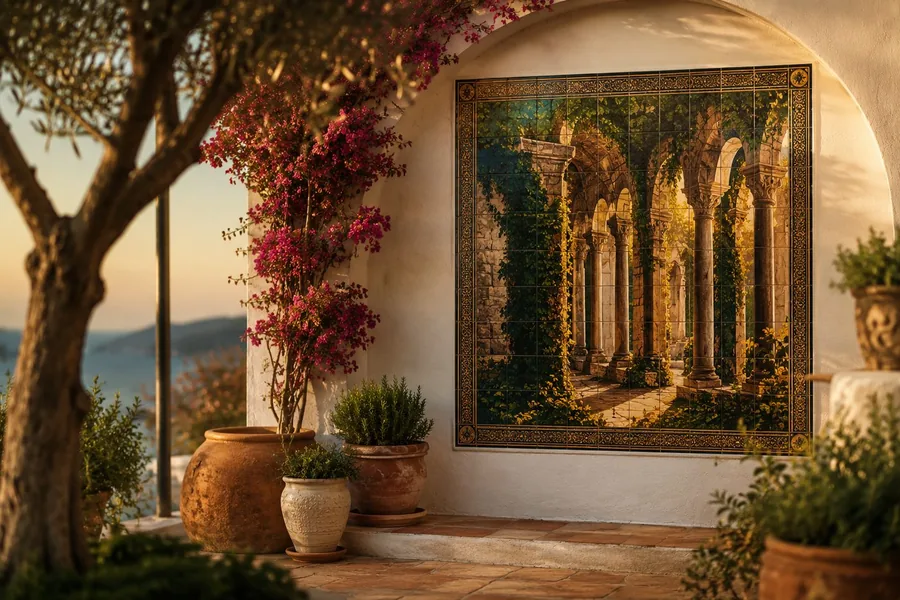
What you receive and what you need
The mural arrives with every tile individually packed in a reinforced box, in sequence, so the composition is easy to follow at a glance. Before you open the adhesive, check that all the pieces are there and none has suffered in transit; if any tile arrives broken, we replace it free of charge.
Tools and materials
| Material | What it is for | Recommendation |
|---|---|---|
| Flexible cement-based tile adhesive | Fixing the tiles | Class C2 (improved adhesive; in the US, a modified thin-set such as ANSI A118.4). Outdoors, C2 S1 or S2, frost-resistant |
| Notched trowel | Spreading the adhesive | 6–8 mm (1/4") notch for 15 or 20 cm tiles |
| Tile spacers | Keeping the joints even | 2 mm; the joint can be anywhere from 1.5 to 3 mm (1/16"–1/8") |
| Grout | Filling the joints after 24 h | Cement-based, in the colour you prefer. Outdoors, frost-resistant |
| Spirit level, tape measure, pencil, straightedge | Marking out and checking | A straight batten works as a guide for the first row |
| Rubber grout float, sponge and bucket | Grouting and cleaning | Plenty of clean water; change it often |
| Primer | Preparing the wall | To suit the substrate: plaster, plasterboard, old tiles |
These are the same materials as for any tiling job. No special adhesive or product is needed because it is a mural.
Before you start: the wall
A mural is looked at up close and head-on, so any unevenness in the wall shows more than it would on plain tiling. Spend time on this and the rest follows.
- Flat. Check with a long straightedge that the wall has no bumps or hollows; if it does, correct them first with render or levelling compound.
- Clean and sound. No dust, grease, flaking paint or wallpaper residue. Anything that is not firmly attached to the wall will eventually come away with the tile.
- Primed. On plaster or plasterboard, apply a bonding primer and let it dry. On cement render, cleaning is usually enough, though a primer never hurts.
- Over old tiles. Tiling directly over existing tiles is common practice if they are well bonded: degrease thoroughly, lightly abrade or apply a bonding primer, and use a C2 adhesive.
- In showers and outdoors, the wall must be waterproofed as appropriate before tiling; the tiles and grout are not a waterproofing layer.
Installation step by step
Dry-lay the mural
Lay the tiles out on the floor in the order they come packed, with the digital proof of the mural at hand and the spacers in place. Check that the image lines up, that no tile is rotated, and measure the total width and height including the joints: those are the dimensions you will mark on the wall.
Mark the position
Use the level to draw a horizontal line for the bottom of the first row and a vertical line through the centre or along the reference edge on the plan. If the mural does not sit on a worktop or skirting, fix a straight batten along the horizontal line so the first row cannot slide.
Spread the adhesive
Mix the adhesive as the manufacturer says. Spread it on the wall with the notched trowel, only over the area you can cover in 15–20 minutes, before it skins over. For 20 × 20 cm tiles, and always outdoors, also apply a thin layer to the back of each tile (back-buttering) so there are no voids for water to get into.
Fix the tiles in the order shown on the plan
Start with the bottom row, from the centre or the reference edge. Place each tile, press it and twist it slightly to bed it, then insert the spacers. Check every row with the straightedge and the level; a tile sitting half a millimetre low shows under raking light. Clean any adhesive squeezing into the joints before it hardens.
Wait 24 hours
Do not touch the mural or get it wet while the adhesive cures. Remove the support batten once the adhesive has set.
Grout
Remove the spacers and mix the grout. Work it in with the rubber float, moving diagonally across the joints so they fill completely. When it starts to go matt (about 15–30 minutes), wipe with a well-wrung damp sponge, rinsing it often. The next day, polish off the white haze with a dry cloth.
Curing
Let the grout cure for as long as its manufacturer states (usually 24 to 72 hours) before the mural gets wet in normal use. Do not use acid cleaners or harsh products on the grout during the first few days.
| When | What to do |
|---|---|
| Day 0 | Prepare the wall, dry-lay, mark out and fix the tiles |
| Day 1 | Grout and first clean |
| Day 2–3 | Remove grout haze; normal use in a kitchen |
| First week | No acid cleaners on the grout; in a shower, respect the grout's curing time |
Outdoor murals: patio, facade and pool
Our tiles cope with sun, rain and frost because the colour is inside the glaze. What has to be up to the job is the installation:
- Frost-resistant C2 S1 or S2 adhesive. The deformability absorbs the movement of the wall as temperatures change.
- Back-buttering, no voids. Water that gets into a void and freezes is what cracks tiles in winter.
- 2–3 mm joints filled with frost-resistant exterior grout. Never butt-joint outdoors.
- Flexible perimeter joints (silicone or polyurethane sealant) where the mural meets corners, frames and the ground, instead of rigid grout.
- Conditions. Avoid tiling below 5 °C (41 °F) or above 30 °C (86 °F), in direct sun on the wall, or if rain is expected in the next 24 hours.
- Pools. For submerged areas, use adhesive and grout designed for swimming pools and, unless it is your trade, an installer with pool experience.
Kitchens and bathrooms: details that matter
- Behind the hob. Heat does not affect the tile. Ordinary cement-based grout is fine; if you want maximum stain resistance, epoxy grout is tougher but harder to apply and clean off.
- Where it meets the worktop. Leave a 2–3 mm gap and seal it with silicone rather than grout: the worktop and the wall move differently.
- Showers. Waterproof the wall before tiling, seal the corners and the joint with the shower tray with silicone, and let the grout cure before using the shower.
- Sockets and pipe outlets. Mark them on the plan before ordering the mural: it is better to place the cuts in an unimportant part of the image.
Common mistakes and how to avoid them
- Not following the plan. Two swapped tiles show immediately in the image and cannot be removed once bedded. Dry-lay first.
- Starting from the top. The weight makes the tiles slide. Always from the bottom row, resting on the worktop or a batten.
- Voids under the tile. Comb the adhesive properly and press; for 20 × 20 cm and outdoors, back-butter.
- Butt-jointing with no gap. Ceramic needs 1.5–3 mm to absorb small size variations and wall movement.
- Grouting the same day. The adhesive needs its 24 hours; otherwise the tiles move.
- Removing the haze with acid. For the first few days, water and a cloth only. Acid cleaners attack fresh grout.
- Fixing with silicone, contact adhesive or grab adhesive. They are not tile adhesive, do not withstand damp or heat and give you no chance to adjust the position.
Cleaning and care
Once the grout has cured, the mural is cleaned like any tile: soap and water, degreaser, glass cleaner or a scouring pad. The colour is not on the surface, so it does not scratch in normal use and does not come off with cleaning products. The grout lines, as on any tiling, benefit from an occasional grout cleaner; leave acid-based products until the grout is fully cured and follow the manufacturer's instructions.
If you would rather not do it yourself
Any tiler can install the mural without special instructions: it is small-format ceramic tile. Hand over the digital proof of the mural with the boxes and say where you want the centre or the reference edge to sit. If you are renovating, ask for the mural to be fixed at the same time as the rest of the tiling, with the same adhesive and grout.
Don't have your mural yet?
Send us the size of the wall and your photo, or pick one of the 1,300 catalogue designs. You get a digital proof and a fixed price within 24 hours; the mural leaves the workshop in 5 working days, with the tiles packed in order.